[Britt Shaw, ERG graduate student]
ERG grad student, Britt Shaw, explains how she built a graywater system and turned "gray" into "gold."
When I first laid eyes on our spacious, but bone-dry backyard, my mind was filled with big ideas – the kind you see in those summer hardware store commercials with smiley DIYers. I dreamt of a garden, and my housemates were also sold on the idea of creating one that we’d sit out and read in, eat from, and enjoy. My only hurdle in this grand effort (other than precious free time) would be water.
However, I soon found that my housemates were already pretty sparing with water and even saved some graywater from the kitchen in a container to water their potted plants. Then, I ran my first load of laundry at the house… bingo — so much useful graywater being wasted!
We have an older, inefficient washer with a wastewater hose that drains straight into a laundry sink next to it. I would venture that our top-loading washer uses an average of 30 gallons of water per normal size load of laundry through the wash and rinse cycles.
Now, you may have the same idea I did: “If the landlord were willing to replace this washer/dryer with more energy- and water-efficient models, we’d save resources and money” (we pay for water as well as gas and electricity). But, alas, that was not an option for us. So, in lieu of that, I decided to design a graywater system to channel all that wasted water out to the garden without displacing any sheet rock nor otherwise involving my landlord.
A note on El Niño: Yes, Californians, it’s raining more often this winter (and snowing!), and that is a glorious turn of events. However, as EBMUD reported, though average precipitation in the utility district was 126% of “normal” as of December 23, the total system storage (EBMUD reservoirs) is still at only 46% of capacity. Through this wet winter, I won’t likely be using much of our laundry graywater. Those hipster-beloved potted succulents can drown, especially without proper soil drainage, people – move ‘em someplace drier or lose ‘em. When the storm season ends, our little backyard reservoir will become pretty essential again.
My goal was to make the least expensive, least invasive (construction-wise) graywater system possible that would still sustain a small edible garden and drought resistant shrubs, flowers, and ground cover. Conveniently, Berkeley does not require a permit for graywater systems using laundry exhaust water nor other electric pumps. (See“laundry to landscape.”)
I picked my simple system design based on some web research, a low budget, and advice from a very helpful employee at Orchard Supply (thanks, Willy!). I bought a 32-gallon animal-proof trash bin (more secure lid) with no wheels, and therefore no holes in the bottom of the bin. This is the cheapest way I found to make a safe storage vessel for the graywater. That is, it’s “safe” as long as it doesn't sit around in the bin in the sun long enough to grow scary bacteria.
I also bought a kit, which included some circular saws for a power drill, a spigot, a rubber stopper, a plastic hose, and a sticker telling me not to drink the water. You could assemble this kit at a hardware store for way less than the kit’s price tag ($27), but I was lazy and a “noob.”
I drilled three circular holes into the bin and attached:
Now to get the water to the bin without carrying it in buckets, I bought a long (8 foot) plastic hose to connect the washer hose to the trash bin. The washer and wastewater hose is conveniently located next to the window that can be seen just above the bin in the first picture in the “Step 1: assembly” set. Because I can’t drill through my exterior walls to make this hose connection permanent, I’m going to run the hose through the open window and connect it to the bin only when we are washing clothes. Yes, it certainly does require more effort than the integrated graywater plumbing system shown below, but for those on a tight budget with uninterested landlords, it works!
To make this design work better for me, I bought a small-wheeled dolly that the bin will sit atop, so that I can roll it from the window to the edge of the back deck where I will attach the drip irrigation lines and water the plants. Because there will be a five foot drop from the spigot to the ground, where I’ll be growing veggies and herbs in planter boxes and non-edible drought-resistant plants, there should be enough downward gravitational force to draw the water from the bin to the plants without any additional energy input. (This is perhaps a good back-of-the-envelope problem for another time.)
Drip irrigation systems are more efficient than watering plants with a regular garden hose. Tiny spigots along the plastic drip irrigation hosing feed water more slowly down to the roots of a plant. This is opposed to spreading water thinly across exposed soil and leaves only to have a large proportion evaporate before reaching the roots. You can also purchase timers to turn on water at specific times of the day (before 9am or after 6pm, for example), or while you are away from the home. I haven’t yet built my planter boxes, so the drip set-up is still under construction, but I’ll be using the remaining winter months to prep the soil and planters for early spring sowing.
The issue of chemicals was a relatively easy problem to begin tackling. I already use graywater-safe laundry detergent and my housemates are willing to switch brands, which cuts out many of the non-natural cleaning chemicals that would concern me. Still, I read up a little more on my detergent’s ingredient list (see below) and found some information on the natural surfactants (or dirt-lifters) derived from coconuts and other “natural” sources. While these plant-derived surfactants are more environmentally friendly than the commonly used surfactants, i.e. sodium dodecyl sulfate (SDS) and sodium lauryl sulfate (SLS), the key ingredient listed on my detergent, “Plant Based Surfactants (Coconut),” is pretty darn vague.
Companies aren’t currently required to explain the composition of these surfactants on the label. Without more information on which chemicals make up the surfactant, it’s hard to know whether it is safe to put on the plants and indirectly ingest. That said, I’m pushing forward knowing that my body is already taking in whatever is in my soap through my skin. If you are interested in graywater safe cleaning products, check out the Ecology Center’s page on the subject here.
As for graywater acidity/alkalinity, I anticipated that my graywater, which contains soap and clothing fibers, would be basic on the pH scale (i.e. greater than 7.0). In addition, our machine spits out water in three different bursts: post-wash cycle, post-rinse cycle, and post spin cycle. By doing a little experiment with the graywater, I thought I might be able to determine if I should only be reserving water for the plants from one or two of the laundry cycles instead of all wash wastewater. I decided to take separate samples from each of these three water output cycles and test them for pH and total dissolved solids (TDS).
My chemistry knowledge was very rusty for this endeavor, so I had forgotten that a TDS meter measures the amount of ions in a solution, including salts, minerals and metals in parts per million (ppm). Thanks to Chris Hyun for clearing things up for me! I would have liked to measure the amount of clothing fibers and other solids in the graywater, which would have been Total Suspended Solids (TSS), but unfortunately was not able to access the equipment to test for TSS.
Given that, I’ll just mention that clothing fibers and various solids from my dirty laundry will end up in the soil. I anticipate that most will settle at the bottom of the barrel, making it easy to clear them out periodically, but it may be prudent for me to add a mesh cloth over the entry to the spigot to filter out larger particles from the solution before it enters my narrow drip hosing.
I was lucky enough to have one of my housemates test the pH of the samples in her climate controlled molecular biology lab with fancier equipment on campus, so I’m fairly confident about those values. My hypothesis was that the post-wash cycle would yield the most alkaline liquid (thinking that more soap would come out after the wash cycle than the rinse and spin cycles). I also hypothesized that the post-spin cycle liquid would have the highest TDS content.
Results:
I was delighted to find that the pH levels of my graywater would be safe to use on the plants, and that they won’t likely have a large impact on the soil pH for the roots.ERG grad student, Britt Shaw, explains how she built a graywater system and turned "gray" into "gold."
 |
 |
| Our "bone-dry backyard" |
Part 1: The Drought and the Renter
Even with native, drought-resistant plant varietals and efficient drip irrigation, a medium-sized edible and floral garden would require a major increase in water use from our baseline — particularly when considering that our outdoor usage back in August was for about 10 small-potted plants. With the East Bay Municipal Utility District (EBMUD) goal of reducing demand by 20% from 2013 usage and institution of Stage 4 drought surcharges, my first thought was to see where we might cut down our water usage in the home so that we could shift that usage to the garden.However, I soon found that my housemates were already pretty sparing with water and even saved some graywater from the kitchen in a container to water their potted plants. Then, I ran my first load of laundry at the house… bingo — so much useful graywater being wasted!
We have an older, inefficient washer with a wastewater hose that drains straight into a laundry sink next to it. I would venture that our top-loading washer uses an average of 30 gallons of water per normal size load of laundry through the wash and rinse cycles.
 |
| Eyesore or gray gold?! (Author's photo) |
Now, you may have the same idea I did: “If the landlord were willing to replace this washer/dryer with more energy- and water-efficient models, we’d save resources and money” (we pay for water as well as gas and electricity). But, alas, that was not an option for us. So, in lieu of that, I decided to design a graywater system to channel all that wasted water out to the garden without displacing any sheet rock nor otherwise involving my landlord.
A note on El Niño: Yes, Californians, it’s raining more often this winter (and snowing!), and that is a glorious turn of events. However, as EBMUD reported, though average precipitation in the utility district was 126% of “normal” as of December 23, the total system storage (EBMUD reservoirs) is still at only 46% of capacity. Through this wet winter, I won’t likely be using much of our laundry graywater. Those hipster-beloved potted succulents can drown, especially without proper soil drainage, people – move ‘em someplace drier or lose ‘em. When the storm season ends, our little backyard reservoir will become pretty essential again.
Part 2: Build, Own, Operate
There are many designs for super efficient, low user effort graywater systems that are integrated into the plumbing of a building. These require some holes in the wall, plumbing work, plumbing know-how (not in my wheelhouse… yet), a permit from the city of Berkeley, and patching or rebuilding of interior and exterior wall sections. This may be a great option for homeowners but isn’t always an option for renters with little to no income.My goal was to make the least expensive, least invasive (construction-wise) graywater system possible that would still sustain a small edible garden and drought resistant shrubs, flowers, and ground cover. Conveniently, Berkeley does not require a permit for graywater systems using laundry exhaust water nor other electric pumps. (See“laundry to landscape.”)
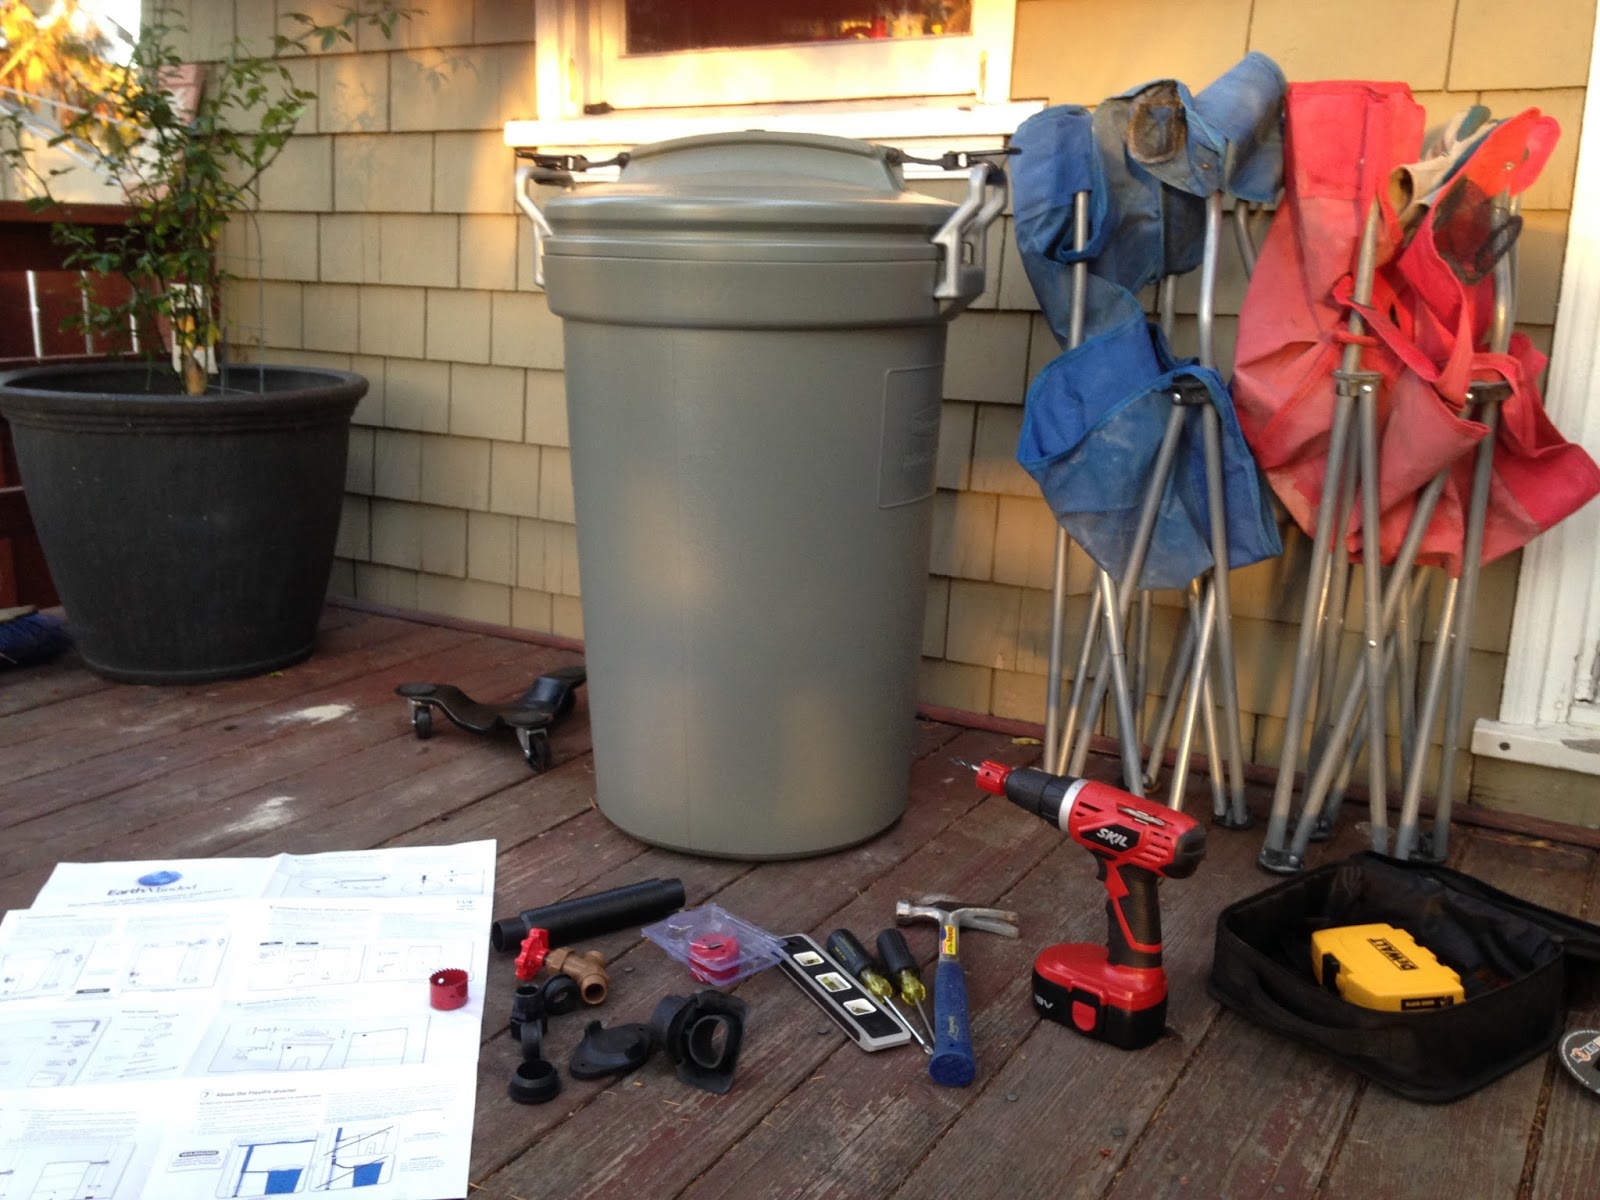 |
| Step 1: Assemble parts for graywater bin – Trash bin, EarthMinded DIY Rain Barrel Diverter and Parts Kit |
I picked my simple system design based on some web research, a low budget, and advice from a very helpful employee at Orchard Supply (thanks, Willy!). I bought a 32-gallon animal-proof trash bin (more secure lid) with no wheels, and therefore no holes in the bottom of the bin. This is the cheapest way I found to make a safe storage vessel for the graywater. That is, it’s “safe” as long as it doesn't sit around in the bin in the sun long enough to grow scary bacteria.
I also bought a kit, which included some circular saws for a power drill, a spigot, a rubber stopper, a plastic hose, and a sticker telling me not to drink the water. You could assemble this kit at a hardware store for way less than the kit’s price tag ($27), but I was lazy and a “noob.”
 |
| DIY Rain Barrel Diverter and Parts Kit |
I drilled three circular holes into the bin and attached:
- a long plastic hose to attach to the washer drain-spout,
- a small stopper to let out water at the bottom of the bin when necessary, and
- a spigot, sized for a garden hose about a foot from the bottom of the bin
 |
| Step 2: Drill holes and screw in attachments. Ta-da! It’s really that easy. |
Now to get the water to the bin without carrying it in buckets, I bought a long (8 foot) plastic hose to connect the washer hose to the trash bin. The washer and wastewater hose is conveniently located next to the window that can be seen just above the bin in the first picture in the “Step 1: assembly” set. Because I can’t drill through my exterior walls to make this hose connection permanent, I’m going to run the hose through the open window and connect it to the bin only when we are washing clothes. Yes, it certainly does require more effort than the integrated graywater plumbing system shown below, but for those on a tight budget with uninterested landlords, it works!
 |
| Example of an integrated, untreated graywater system for irrigation. (Source: Crook, J. and Rimer, A.E. (2009) “Technical Memorandum on Graywater”, Black and Veatch Technical Report, p. 4.) |
To make this design work better for me, I bought a small-wheeled dolly that the bin will sit atop, so that I can roll it from the window to the edge of the back deck where I will attach the drip irrigation lines and water the plants. Because there will be a five foot drop from the spigot to the ground, where I’ll be growing veggies and herbs in planter boxes and non-edible drought-resistant plants, there should be enough downward gravitational force to draw the water from the bin to the plants without any additional energy input. (This is perhaps a good back-of-the-envelope problem for another time.)
Drip irrigation systems are more efficient than watering plants with a regular garden hose. Tiny spigots along the plastic drip irrigation hosing feed water more slowly down to the roots of a plant. This is opposed to spreading water thinly across exposed soil and leaves only to have a large proportion evaporate before reaching the roots. You can also purchase timers to turn on water at specific times of the day (before 9am or after 6pm, for example), or while you are away from the home. I haven’t yet built my planter boxes, so the drip set-up is still under construction, but I’ll be using the remaining winter months to prep the soil and planters for early spring sowing.
Part 3: Is it safe?
Common sense and the sticker on my graywater bin tell me that I probably shouldn’t drink this water. But, can I eat what it helps me grow? My goal in this project was not only to create a cheap graywater system that would produce enough water for my garden, but also one that would yield safe water for my edible plants. There were three potential problems I foresaw with our laundry graywater:- chemicals from laundry soap that might be harmful
- high alkalinity (because soap is typically alkaline or basic)
- clothing fibers, especially synthetics
The issue of chemicals was a relatively easy problem to begin tackling. I already use graywater-safe laundry detergent and my housemates are willing to switch brands, which cuts out many of the non-natural cleaning chemicals that would concern me. Still, I read up a little more on my detergent’s ingredient list (see below) and found some information on the natural surfactants (or dirt-lifters) derived from coconuts and other “natural” sources. While these plant-derived surfactants are more environmentally friendly than the commonly used surfactants, i.e. sodium dodecyl sulfate (SDS) and sodium lauryl sulfate (SLS), the key ingredient listed on my detergent, “Plant Based Surfactants (Coconut),” is pretty darn vague.
Companies aren’t currently required to explain the composition of these surfactants on the label. Without more information on which chemicals make up the surfactant, it’s hard to know whether it is safe to put on the plants and indirectly ingest. That said, I’m pushing forward knowing that my body is already taking in whatever is in my soap through my skin. If you are interested in graywater safe cleaning products, check out the Ecology Center’s page on the subject here.
 |
Trader Joe's Biodegradable Laundry Soap ingredients label. Several of the ingredients are vaguely defined (surfactants, fabric softener, and optical brightener). I plan to research further whether this will have an impact on my food quality. (Author’s photo) |
As for graywater acidity/alkalinity, I anticipated that my graywater, which contains soap and clothing fibers, would be basic on the pH scale (i.e. greater than 7.0). In addition, our machine spits out water in three different bursts: post-wash cycle, post-rinse cycle, and post spin cycle. By doing a little experiment with the graywater, I thought I might be able to determine if I should only be reserving water for the plants from one or two of the laundry cycles instead of all wash wastewater. I decided to take separate samples from each of these three water output cycles and test them for pH and total dissolved solids (TDS).
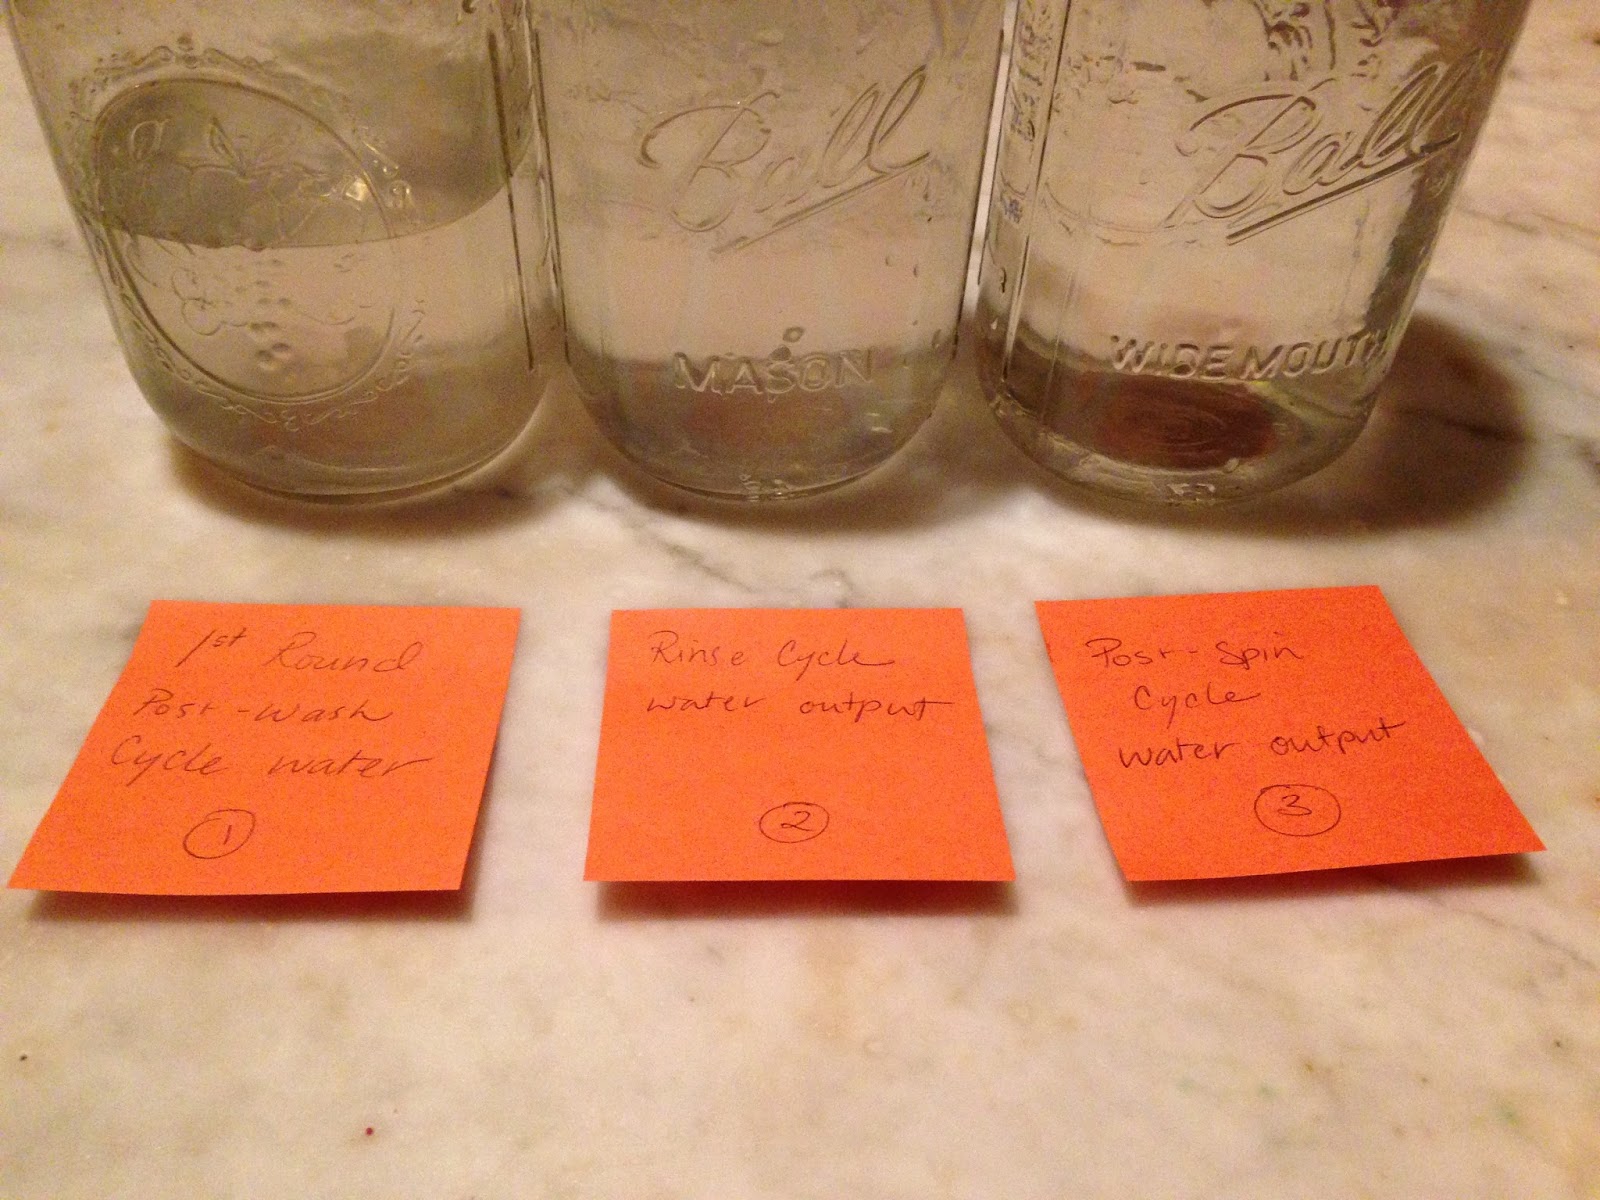 |
| Three water samples from the laundry cycles in covered containers (Author’s photo) |
My chemistry knowledge was very rusty for this endeavor, so I had forgotten that a TDS meter measures the amount of ions in a solution, including salts, minerals and metals in parts per million (ppm). Thanks to Chris Hyun for clearing things up for me! I would have liked to measure the amount of clothing fibers and other solids in the graywater, which would have been Total Suspended Solids (TSS), but unfortunately was not able to access the equipment to test for TSS.
Given that, I’ll just mention that clothing fibers and various solids from my dirty laundry will end up in the soil. I anticipate that most will settle at the bottom of the barrel, making it easy to clear them out periodically, but it may be prudent for me to add a mesh cloth over the entry to the spigot to filter out larger particles from the solution before it enters my narrow drip hosing.
I was lucky enough to have one of my housemates test the pH of the samples in her climate controlled molecular biology lab with fancier equipment on campus, so I’m fairly confident about those values. My hypothesis was that the post-wash cycle would yield the most alkaline liquid (thinking that more soap would come out after the wash cycle than the rinse and spin cycles). I also hypothesized that the post-spin cycle liquid would have the highest TDS content.
 |
| This is what my digital TDS meter looks like - it is accurate to 3 significant figures and was rinsed with lab grade distilled water between readings. (Author’s photo) |
Results:
Cycle type in order
|
pH
|
TDS (parts per million)
|
Post-Wash Cycle
|
6.60
|
38.3
|
Post-Rinse Cycle
|
6.78
|
36.8
|
Post-Spin Cycle
|
7.07
|
36.1
|
Contrary to my hypothesis, the pH values for the samples were in fact slightly acidic until the spin cycle. Another lazy science admission: I hadn’t measured the pH of my tap water to see what the acidity of the effluent would be without soap and soiled clothing (ugh, silly me!). It’s highly unlikely that the city water entering my washer is perfectly neutral, so that could have been a factor. In addition, I think the post-wash and post-rinse cycles may have been slightly acidic because sweat and some other human body fluids tend to be acidic (see here for an interesting study on pH changes in thermal induced sweat versus hormonal induced sweat).
As I found in my quick research on optimal soil pH for various plants, the edible plants I’ll grow (tomatoes, green beans and lettuce, to name a few) “prefer” soil pH levels in the range of 5.5-7.0. I can adjust the soil pH if needed by adding rock powders, sulfur or limestone, but am hoping I won’t need to.
The TDS readings were also a relief to see, since they translate to about 37 milligrams of dissolved solids per kilogram of water. This means that there is a low number of ions in the solution (including salts and minerals from the soap and soiled clothing), and I anticipate that they will have negligible effects on the soil.
From this little experiment, I have concluded that it will be reasonably safe to use the wastewater from the entire wash process in my plants.
In the spring, I hope to follow this up with a check in on how the plants have fared with graywater (which I’ll gauge by having a control area watered with potable city drinking water and rainwater). I also hope to find a way to run tests on any toxins that may be in my homegrown vegetables, perhaps at the College of Natural Resources’ Oxford Tract. Stay tuned!